Speak with an Instrument Expert during business hours!
Business Hours:
Mon-Fri: 8:30am - 5:00pm
Sat-Sun: Closed
You Call, We Answer!
Chat with a real person
Email us directly
More Information
1-800-826-5482
contact@goldtone.com
Live Chat
Find A Dealer
Return Policy
Warranty Registration
Return Authorization (RA)

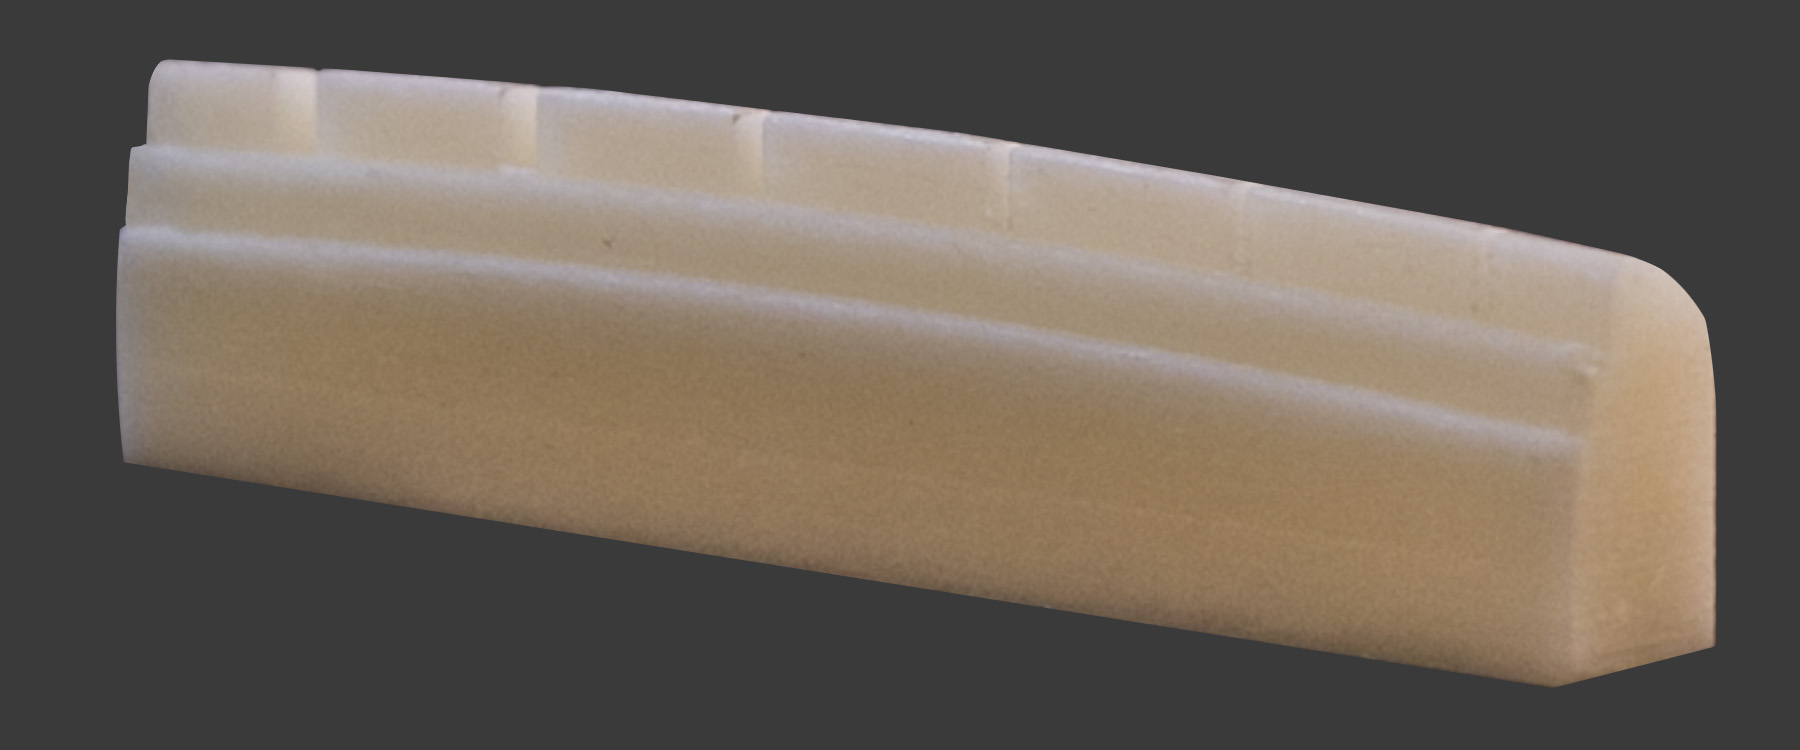
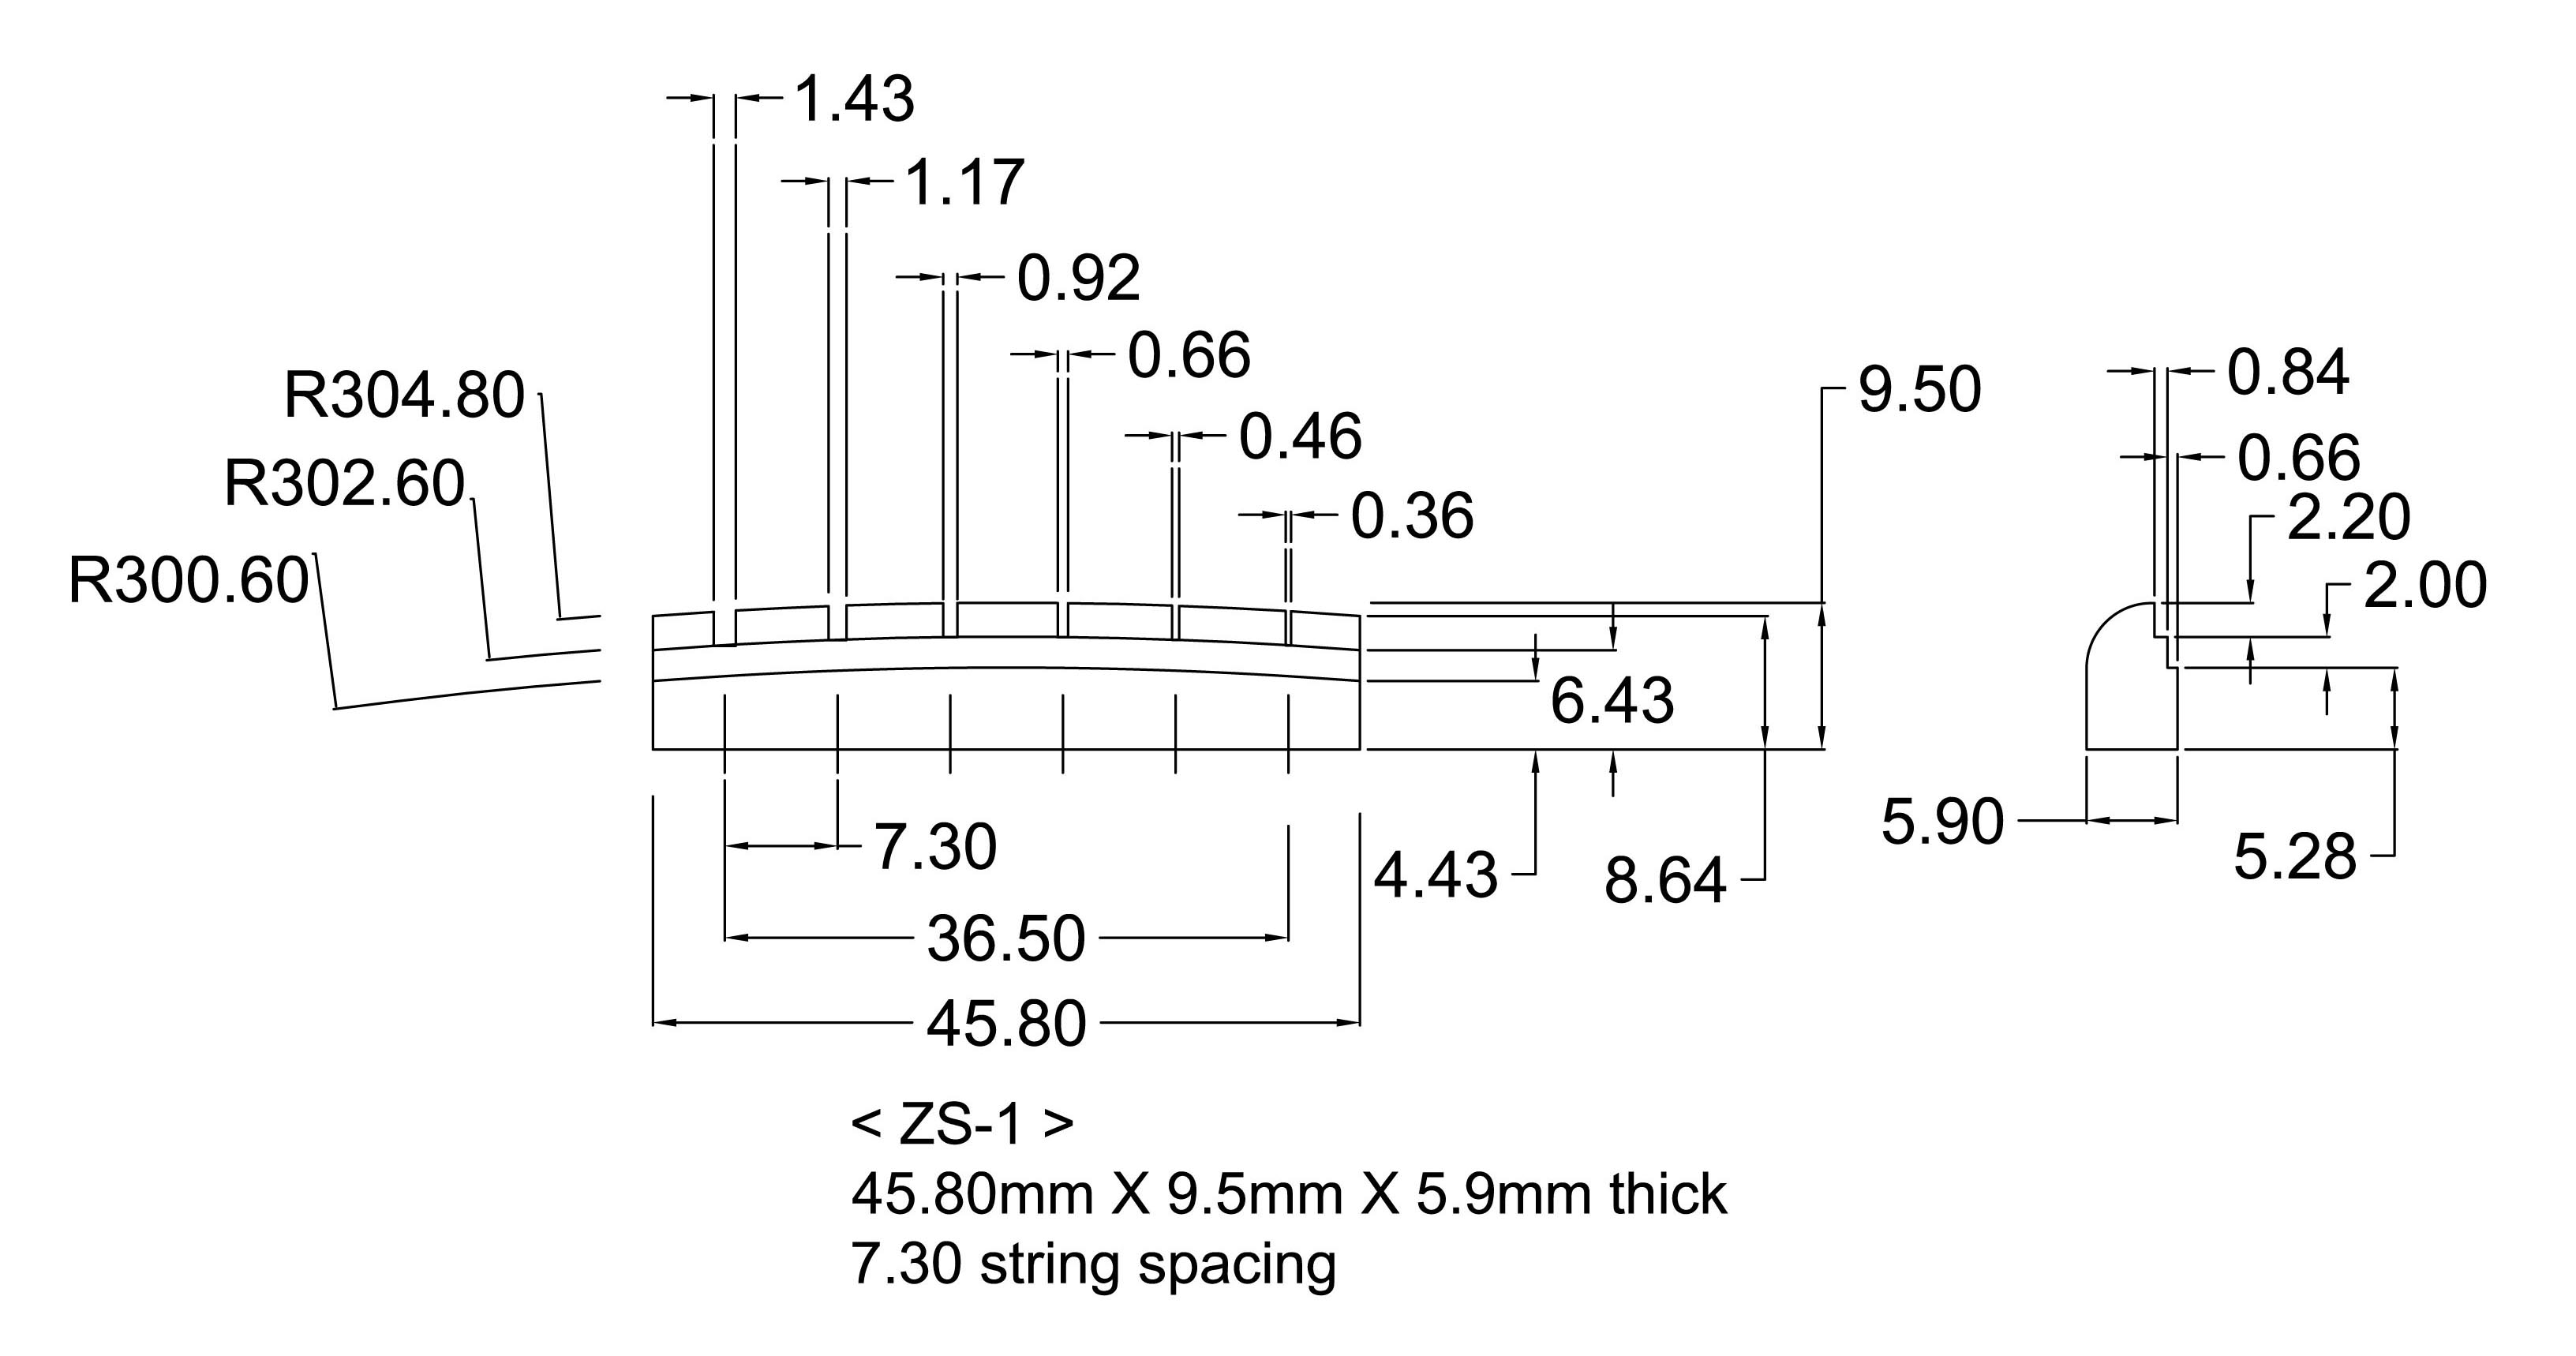
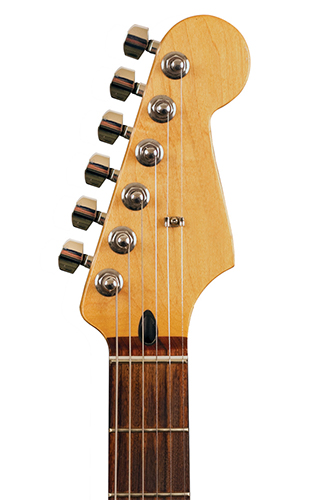
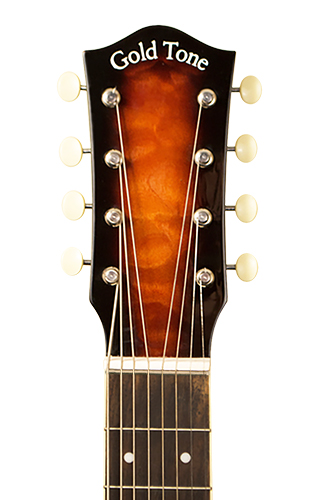
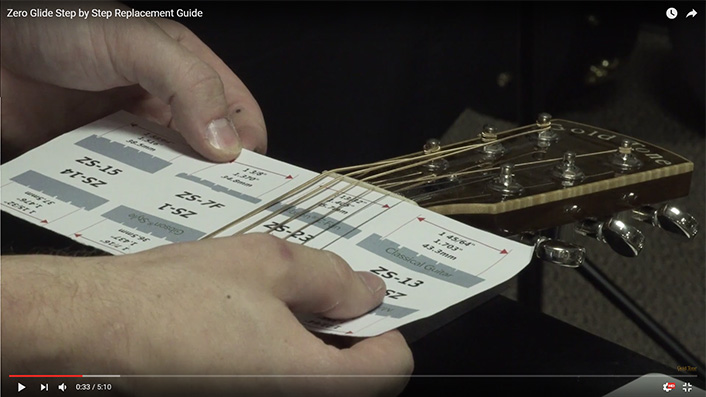
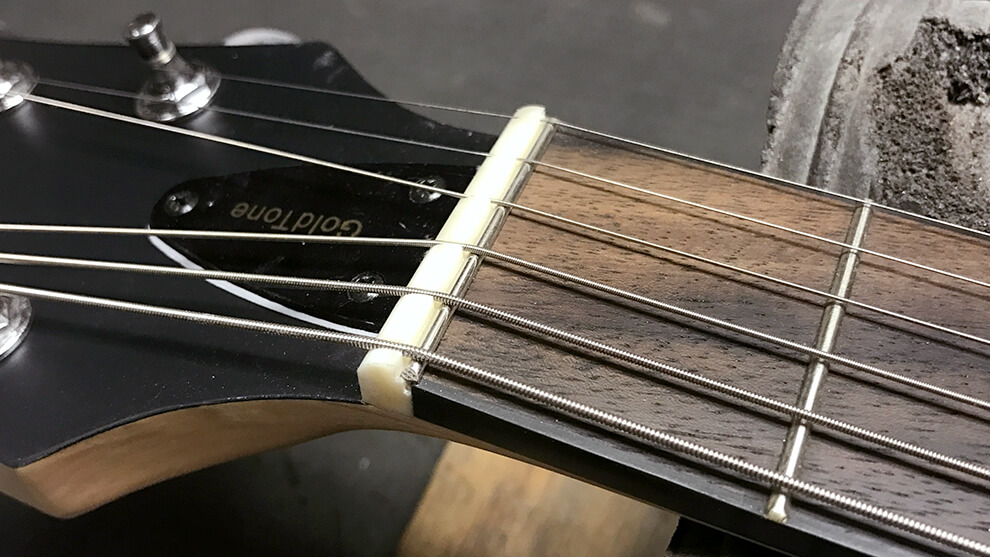
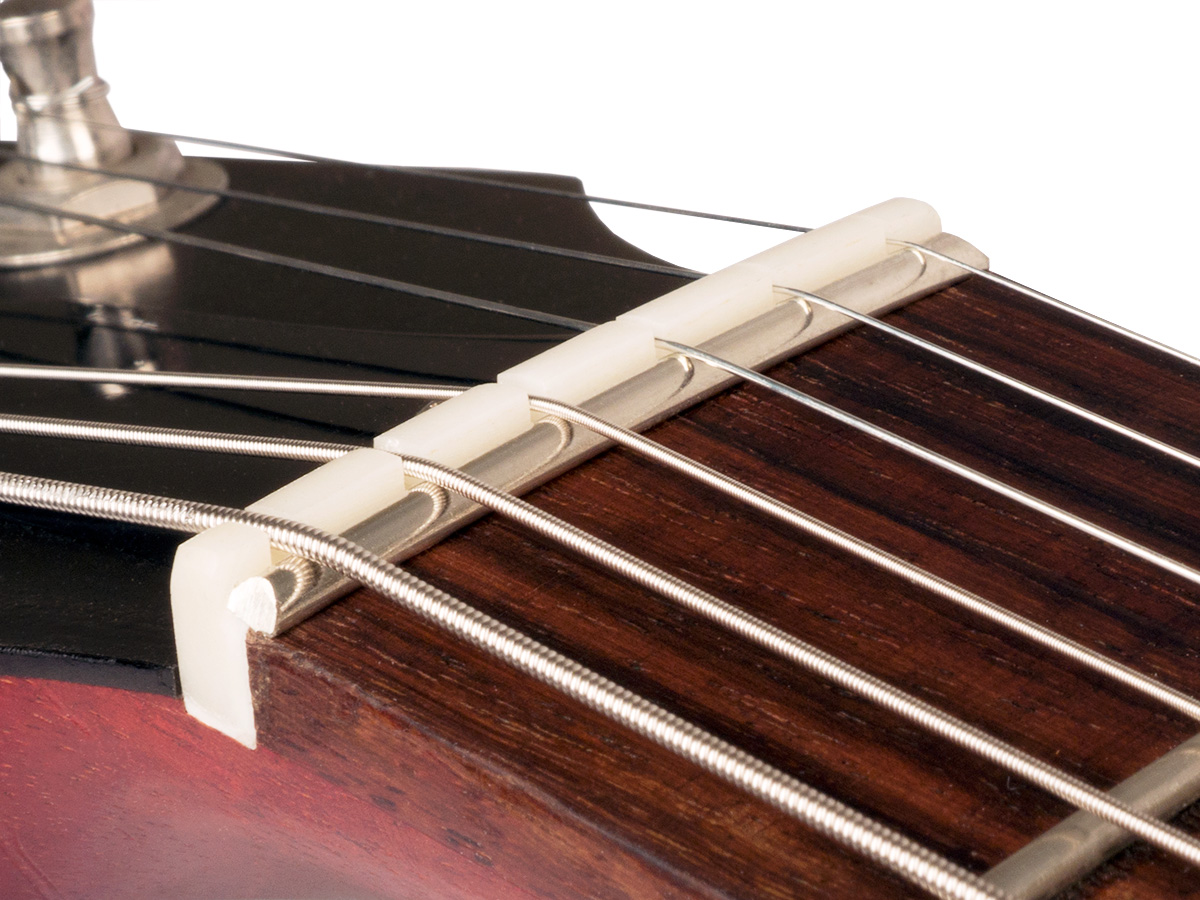
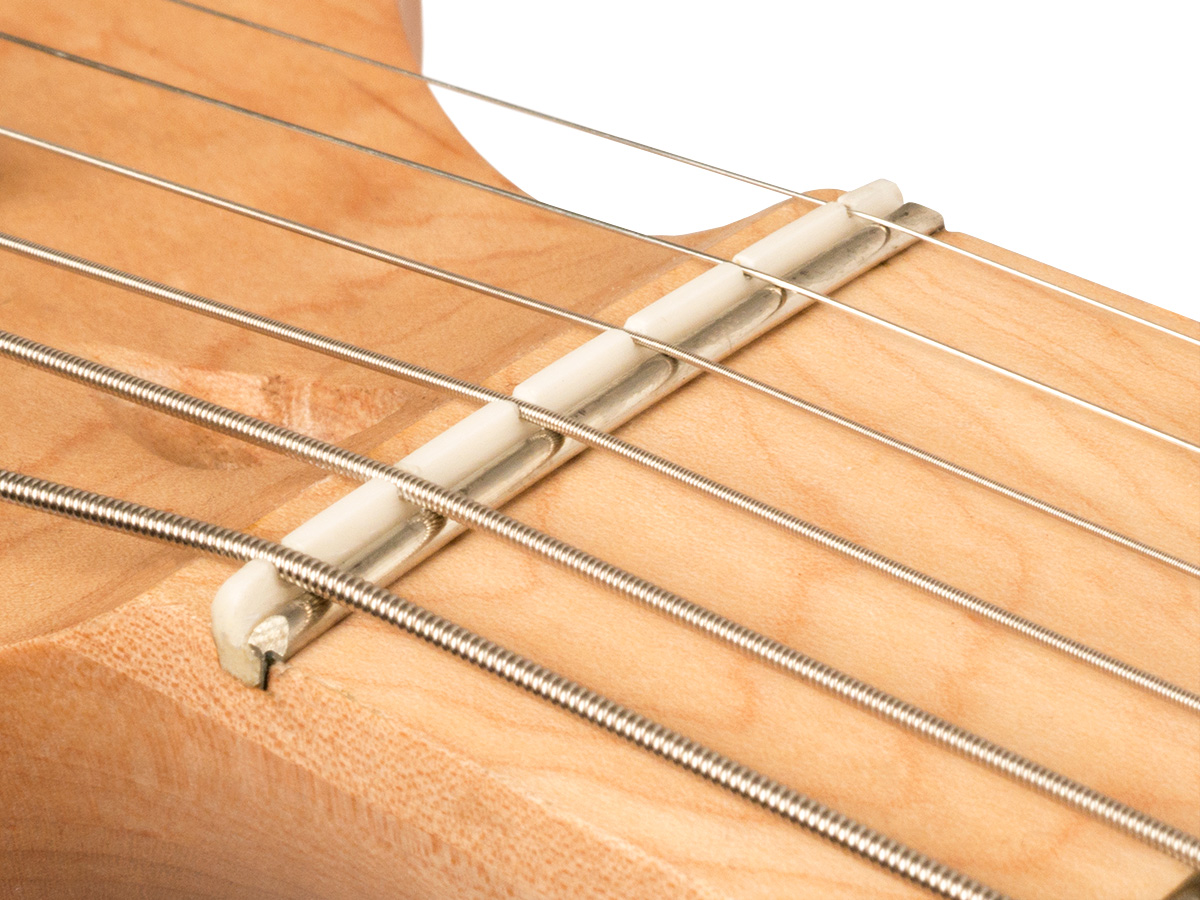
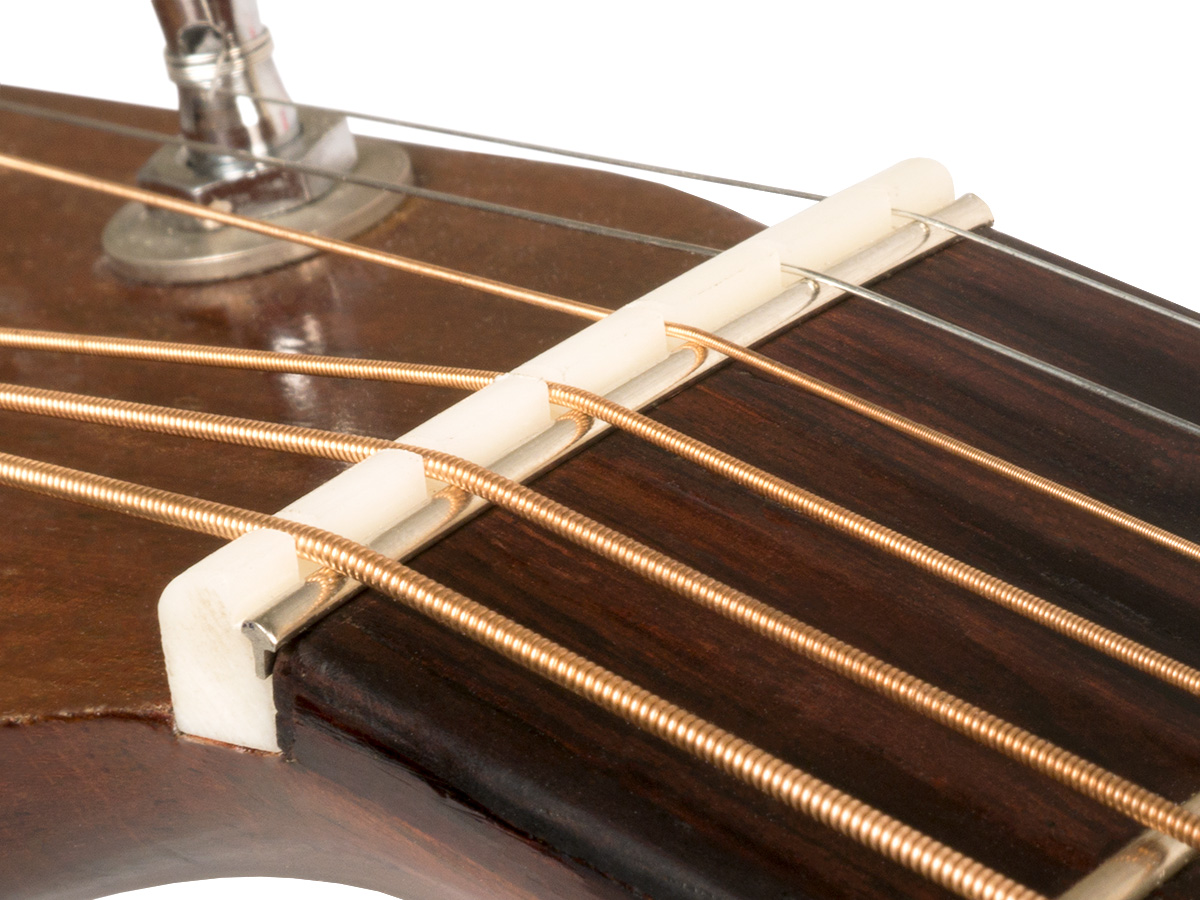
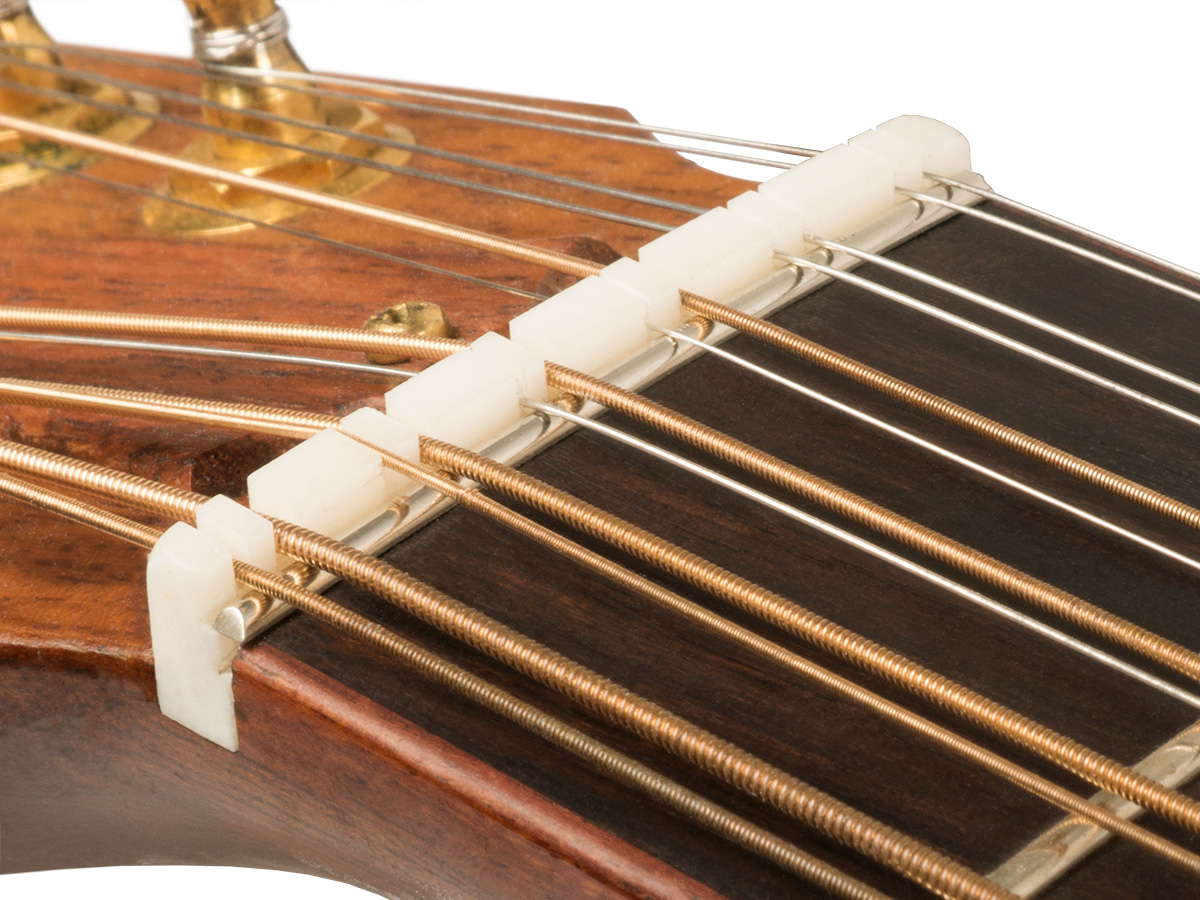
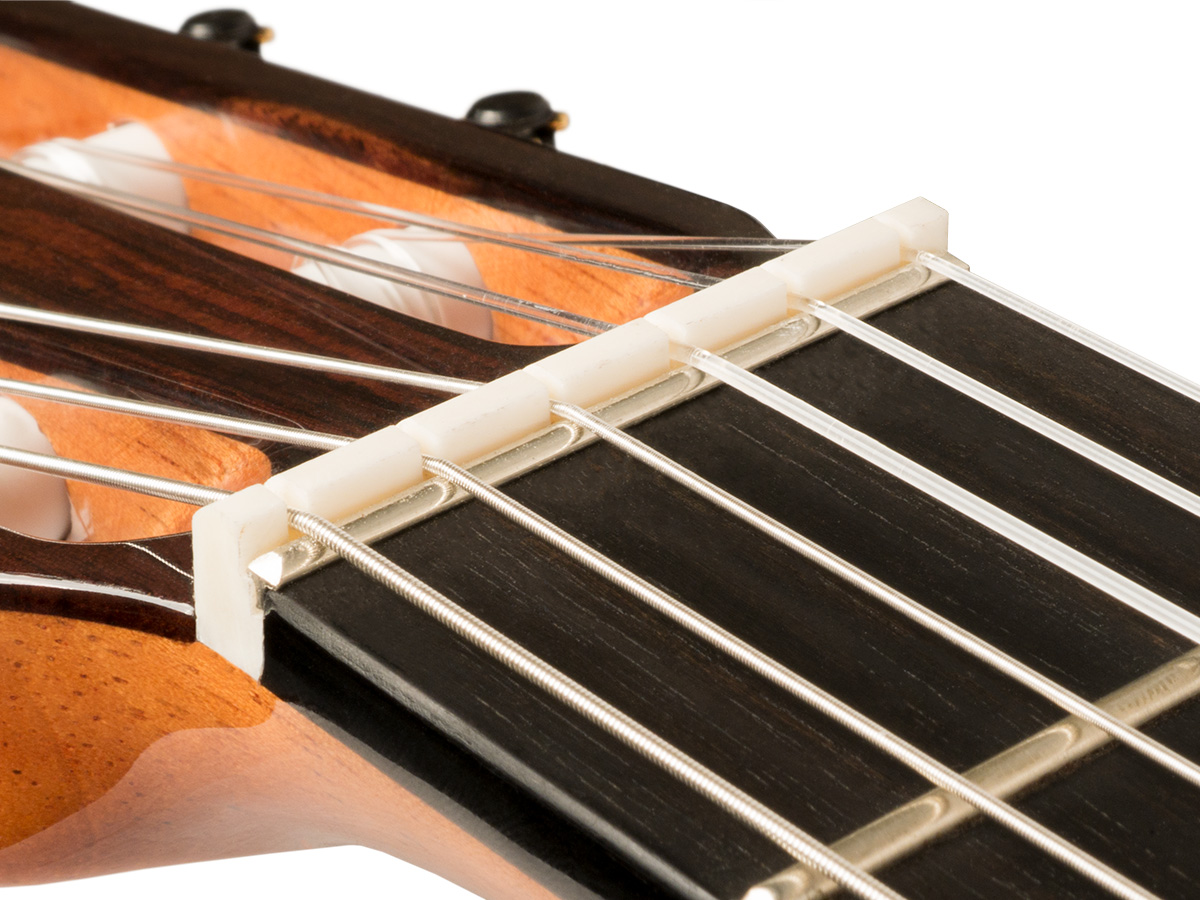
The Zero Glide Replacement Nut System borrows the "zero fret" concept to reduce string contact in the nut by up to 93%, increasing tuning stability, playability, and open string tone. It only takes a few minutes to install with absolutely no permanent alteration to your instrument. For Gibson Style Guitar.
Also available in Black Delrin.
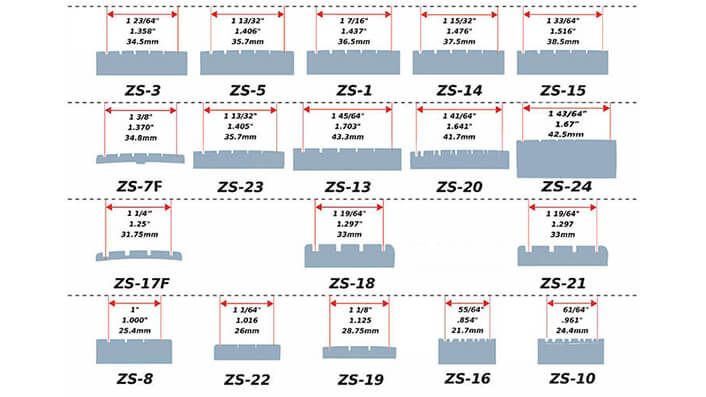
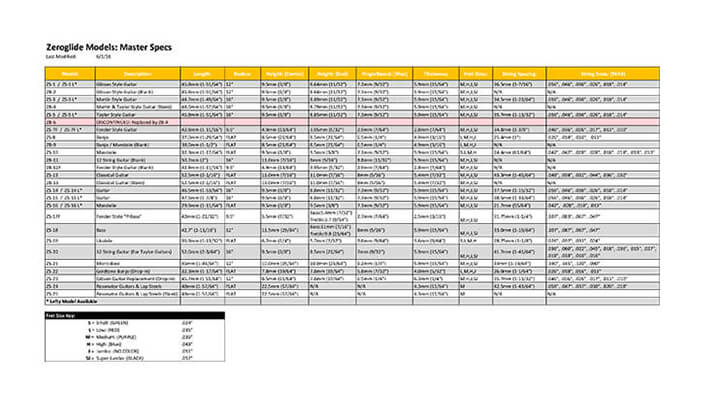
Note: May not fit specific models. Check the sizing guide to be sure.


I wrote another review about Zero Glide and my Gold Tone OB 150 banjo. As many already know the Zero Glide Nut is standard equipment on the OB 150 banjo. Gold Tone has this nut on other instruments too. I like this nut system for a lot of reasons. I installed a Zero Glide nut on my Martin D custom and I even installed a Zero Glide on my Washburn M3SWK F body mandolin. Those stock plastic nuts on many of the entry level pro instruments just does not cut it. You are cheating yourself and your audience out of a lot of tone and sweetness that ears should be hearing. The Zero Glide nut does a world of wonders for my instruments. Do yourself a favor and get one on your axe. You may love it. I know I do. I am addicted to Zero Glide.
I have a Yamaha F310 and the nut was cut real high. Looking around on the internet I came across the ZerO Glide and decided to give it a try. It was less expensive that having the nut cut or purchasing the tools to do it. Printed out the sizing chart and found the ZS-5 had the correct spacing. In less than an hour my guitar felt and sounded great. This is one hell of a product and glad I made the purchase.

Just got a second one. Used the first on a Tele build. The multiple heights included give plenty of options. Takes some tweaking but so does a standard nut and you don't have to worry about overdoing anything.
An inexperienced guitar tech worked on the nut of my Guild M75 Aristocrat electric and I ended up with a "sitar" sound on my high E string and a dead G string and bad intonation. A friend recommended Zero Glide and that company recommended this particular nut.
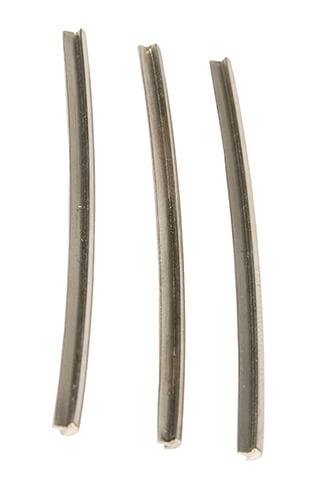
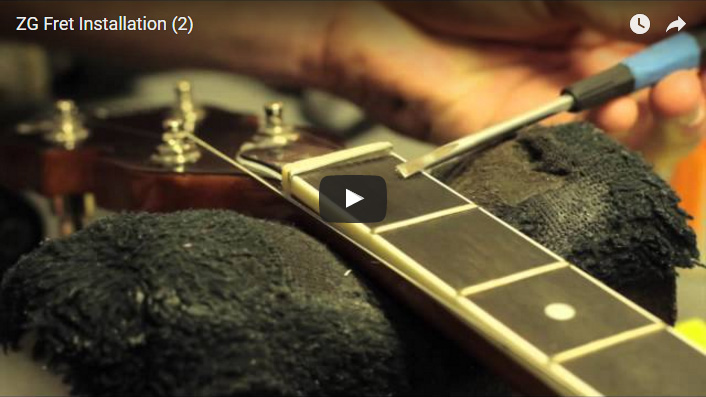
Installation was not particularly difficult for a handy guy, but took two hours and involved sanding nearly 1/8 inch off the bottom of the new nut and 1/16th plus off each side while being careful to keep it even. The video on the company website helps. Once fitted correctly you decide how big of a 'zero fret' you want. There are four of different sizes in the package. I tried them all and found that the smaller ones provide very low action at the nut (which is nice), but require a higher action up the neck to clear the first fret where the strings can rattle. I ended up using the largest fret provided as it allowed me low action where I need it. Once you have it figured out you trim the zero fret to length and glue it